Pages

Showing posts with label vegan. Show all posts

Friday, April 25, 2014

Cheesy Quinoa and Seitan Casserole

There is A LOT going on with this recipe, but trust me, it is SOOO filling and SOOO good!  We have been working a lot lately, so when we get home we are HUNGRY.  Enter this rich, creamy, and protein packed casserole that is absolutely bursting with flavor.  I can honestly say this is one of my most favorite recipes I've every come up with.  


Cashew cheese was pretty much the catalyst that made me fall in love with vegan cooking.  I had cashew cheese on a sandwich in a vegan restaurant one day and I thought, I want to learn how to make that!  Since then I've fallen in love with cashew cheese sauce, or nut cheese as we jokingly call it, but I always feel a little guilty knowing how much fat are in cashews, albeit the good kind.  I sought out to cut my standard cheese sauce recipe from one full cup of cashews to half a cup in order to make the recipe more fat friendly friendly for a two serving portion because I knew it was already going to be very rich.  Throwing quinoa and seitan into the mix packs this casserole full of plant based protein while the flavorfully seasoned cheese sauce brings it all together.  Feel free to omit the hot sauce if you are really nervous about it, but trust me, it really adds to the flavor and there's so much else going on that it isn't enough to make your mouth burn.

TIP:  This is also really good and faster on it's own without the onion topping, but if you really want that rich comfort food effect, go for the extra effort!

Without and With the Crispy Fried Onion Topping

TIP:  Try making a big batch of seitan cutlets at once to always have some on hand and take some of the prep work out of this recipe.  They freeze really well!  After steaming them, allow to cool for an hour or two in the fridge.  Individually wrap each cutlet tightly in foil and place in an airtight container or bag in the freezer.  If you are really pressed for time or don't like making your own seitan, any store-bought seitan cutlet will do.

Ingredients
Serves 2
  • Cheese Sauce Ingredients
    • 1/2 c raw cashews, soaked for 2+ hours and drained
    • 1/2 c unsweetened almond milk
    • 1/4 tsp smoked paprika
    • 1/2 tsp garlic powder
    • 1/2 tsp onion powder
    • 1/4 tsp turmeric 
    • 1/2 tsp sea salt
    • several grinds of freshly ground black pepper
    • 2 T nutritional yeast
    • 1 T hot sauce
    • 1/2 c veggie broth

  • 1 seitan cutlet, sliced into small, thin slices
  • 3/4 c quinoa
  • 1.5 c water or veggie broth
  • olive oil
  • reduced sodium soy sauce, 

  • Crispy Fried Onion Topping 
    • 1 T coconut oil
    • 1 medium onion, sliced thinly
    • 1/4 c bread crumbs
    • 1/2 tsp italian seasoning

  1. Preheat oven to 400 degrees.
  2. First, add one and a half cups of water or vegetable broth to a small pot and stir in the quinoa.  Bring to a boil, cover, and reduce to a simmer.  Simmer until all of the liquid has been absorbed.  About 10-15 minutes.
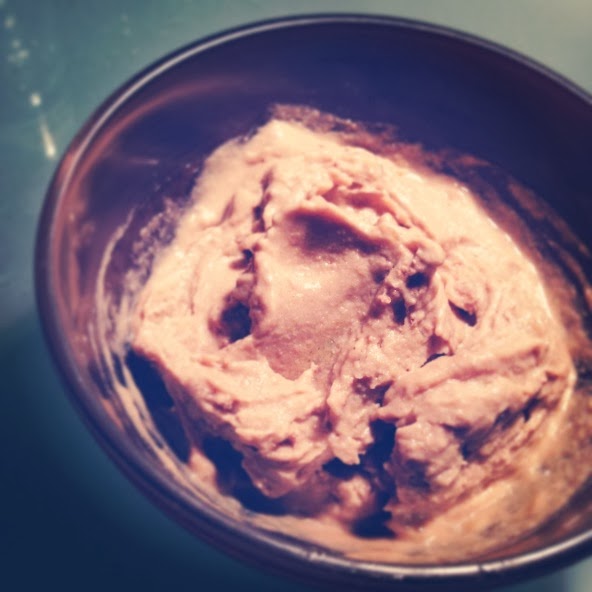
  3. While the quinoa is cooking make the cheese sauce by first blending the soaked and drained cashews together until smooth and creamy.  Add in all remaining cheese sauce ingredients and blend until completely mixed and smooth.
  4. In a medium skillet, heat a tablespoon of olive oil over medium high heat.  Add the seitan and cook for about 7 minutes or until the seitan is slightly crispy and browned.  Use a wooden spatula to break up the seitan into small pieces while it cooks, almost like the texture of a philly cheese steak.
  5. Sprinkl about a tablespoon of soy sauce over the seitan.  Stir and cook for about 2 minutes more.
  6. Once the quinoa is done cooking combine it in a mixing bowl with the cheese sauce and seitan.  Stir to mix evenly.
  7. Pour into two oven safe ramekins or a small casserole dish and bake for 10 minutes.
  8. Meanwhile, heat another tablespoon of olive oil in the same skillet over medium high heat and add the onions.  Cook for about 7 minutes until softened and browned.  
  9. Add the bread crumbs, italian seasoning, and a few dashes of hot sauce and stir to coat the onions evenly.
  10. Cook for about another two minutes, stirring very frequently.  You want the onions to be coated and the the loose breadcrumbs to be toasted but not burned.
  11. Just as your onions are finished cooking the ramekins should be ready to come out of the oven.  Split the onion and breadcrumb mixture evenly over the tops of the two dishes and return to the oven for another 10 minutes.

Monday, April 7, 2014

Apple Seitan Sausages with Balsamic Sauerkraut

The more I've been cooking the more I've wanted to move away from pre-packaged foods.  Sometimes you come home from work and you just want something quick and easy to pop in the microwave, but when I have the time I feel so much better making dinner from scratch with whole food ingredients.  This recipe is a great example of that desire to branch out from the package.  I've been working on a sausage recipe to replace our old standby soy Italian Sausages from Trader Joe's and I think this is it!  The sausages are smoky, spicy, and sweet and topping them with this sweet and sour balsamic sauerkraut is the perfect pairing.  A little bit of apple goes a long way in both the sausage and the kraut and really brings it all together.  I was anxious about how they'd turn out, but David said he liked them better than the store bought sausages, so mission accomplished!


Ingredients
Makes 4 Sausages

  • 1 c vital wheat gluten
  • 1/4 c chickpea flour
  • 1/4 c nutritional yeast
  • 3/4 tsp salt
  • 1 tsp smoked paprika
  • 1 tsp freshly ground black pepper
  • 1 tsp red pepper flakes
  • 1 tsp fennel seeds
  • 1/2 tsp garlic powder
  • 1/2 tsp onion powder
  • 1/4 tsp coconut sugar
  • 1 T olive oil
  • 1 T maple syrup
  • 1 T soy sauce
  • 1 tsp liquid smoke
  • 2/3 c water or veggie broth
  • 1 sweet red apple, divided 
    • 1/4 c shredded for the sausages, remainder of apple diced for sauerkraut
  • 1/2 head red cabbage, sliced thinly
  • 2 T coconut oil
  • 2 T coconut sugar
  • 1/3 c balsamic vinegar
  • 4 whole wheat buns
  • Vegenaise
  1. Mix all dry sausage ingredients together thoroughly in a mixing bowl.
  2. Combine the oil, syrup, soy sauce, liquid smoke, and water/broth in a small bowl and set a side.
  3. Wash and remove the stem of your apple and shred it until you have 1/4 cup shredded apple.  Dice the remainder of the apple and set aside for the sauerkraut.
  4. Add the apple and wet ingredients to the mixing bowl and mix until a spongey moist dough has formed and all ingredients have been incorporated.
  5. Use your hands to knead and mix the dough for about another 3 minutes to makes sure the ingredients are mixed and the texture toughens up slighltly.
  6. Tear off four 1ft x 1ft squares of aluminum foil
  7. Divide the dough into 4 equal pieces and roll and shape each piece into sausages about 6 inches long.
  8. Roll up the sausages in the foil pieces and twist on the sides (see photo) like a tootsie roll.
  9. Set up a steamer on the stove top and steam the sausages for 30 minutes.  When done remove from the steamer and allow to cool for about 5 minutes before handling them.
  10. While the sausages steam, heat the coconut oil in a large saucepan over medium high heat.  Add the cabbage and wilt it for about 5 minutes.
  11. Add the coconut sugar and apple and mix through the cabbage before adding the balsamic vinegar.
  12. Cover and reduce the heat to medium low and cook for 30 minutes, stirring frequently.
  13. When the sausage and sauerkraut are ready, smear each side of each bun with some vegenaise, place the sausage in the bun, and top liberally with the cabbage.  (Optional: Grill the sausages for about 5 minutes on a grill pan over medium heat before serving.)

Artichoke and Kale Hemp Seed Dip

We have been big fans of the artichoke dip from The Kind Diet, but at the end of the day, you are still eating a whole bunch of fatty oily type mayo even if it is Vegenaise. This dish is rich and creamy too but the fat comes from cashews and hemp seeds instead, a much healthier and beneficial alternative.  I’ve also added crushed red pepper, nutritional yeast, and turmeric instead of mustard.  We like to top any dip off with some panko and some sort of seasoning like paprika or italian seasoning.

Serve the dip with tortilla chips, pita chips, or make your own crostini by slicing a whole wheat baguette into 1/4 in slices, brush with olive oil and garlic, and bake in the oven at 425 until toasted golden brown.


Ingredients
  • 1 cup plain unsweetened non-dairy milk
  • 3 tbsp freshly squeezed lemon juice
  • 2 large cloves garlic
  • 1/2 tsp sea salt
  • 1/2 tsp turmeric
  • 2 Tbs nutritional yeast
  • freshly ground black pepper to taste
  • ¾ cup raw cashews, soaked
  • 1/4 cup hemp seeds
  • 2 cups frozen artichoke hearts, measured frozen, but let them thaw before cooking
  • 2 cups loosely packed chopped kale
  • 1/4 tsp crushed red pepper
  • 1/4 c panko crumbs
  • paprika or italian seasoning

  1. Soak the cashew for 2-5 hours.  When ready to use drain and discard water.
  2. Preheat oven to 425.  Drain Use an immersion blender or a high speed blender to to blend the cashews, non-dairy milk, lemon juice, garlic, sea salt, turmeric, nutritional yeast, black pepper, and hemp seeds until completely smooth.
  3. In a large bowl mix the cashew cream through the artichoke hearts.  Blend until mostly smooth leaving a few chunks for texture.  Add the chopped kale and pulse the blender but don’f fully blend smooth in order to keep a slightly chunkier texture.
  4. Transfer to an oven proof dish and sprinkle the panko crumbs evenly over the dip.  Lightly sprinkle seasoning of your choice.  
  5. Bake for about 20 minutes or until the edges are starting to get brown.  


Saturday, March 15, 2014

Smoky Maple Seitan Sausage Links

These simple sausage links are smoky, spicy, and sweet!  I couldn't get over how easy these were to  make and it seems so impressive.  My roommate's response: "you MADE those?!"  The secret is some aluminum foil and a steamer.  After an initial test run we thought the maple and smoky flavors were great but it needed some spice to balance the fennel and maple syrup.  Some crush red pepper does the trick.  If you don't like spicy foods just omit the pepper and enjoy the smoky sweetness.  I also cooked them in a pan after steaming to brown the outside of the links and added an extra bit of maple flavor.


Ingredients
Makes 8 Sausage Links

  • 1 cup vital wheat gluten
  • 1/8 cup nutritional yeast
  • 1 Tbsp dried sage
  • 1/8 tsp nutmeg
  • 1/8 tsp ground cloves
  • 1/8 tsp cinnamon
  • 1/2 ground black pepper
  • 1/2 tsp fennel seeds
  • 1/2 tsp crushed red pepper (optional)
  • 1/2 tsp garlic powder
  • 1/4 tsp onion powder
  • 2 T pure maple syrup, divided (1 T for sausage mixture, 1 T for pan glazing)
  • 1 tsp liquid smoke
  • 1 T reduced sodium soy sauce
  • 1/2 c vegetable broth

  1. Combine all dry ingredients in a medium mixing bowl.
  2. Combine all wet ingredients in another small cup or bowl.
  3. Slowly mix in wet ingredients to the dry mixing bowl, stirring quickly, until a moist spongey "dough" forms.
  4. Use your hands and knead the dough in the bowl for about 3 minutes to ensure all ingredients are mixed through.
  5. Separate the dough into four equal sized pieces.
  6. Tear or cut foil into sheets about 8 in. wide.
  7. Tear each ball of dough into two pieces and use your hand to squish and roll each piece into a sausage link shape (about 3-4 in. long).  Roll up in the foil and twist the ends tight, like a candy wrapper.  Fold the ends down.  (see picture)
  8. Set up a steamer on your stove top and when water is boiling place your sausage links in, cover, and steam for about 20 minutes or until links feel firm.
  9. Remove and let cool for about 5 minutes and foil is cool to the touch.
  10. Spray a nonstick skillet with cooking spray and heat over medium high heat.  Unwrap and add the sausage links to the pan and cook for about five minutes until links are browning.  Make sure to move links around to get each side browned.
  11. Pour 1 T of maple syrup over the links and stir quickly to glaze each link in the syrup before it completely evaporates and serve immediately.

Serving Idea:  I served the links with polenta slices, pan fried in coconut oil, with a chopped green onion, and topped with avocado.  


Adapted from this recipe.

Friday, March 7, 2014

Falafel Zucchini Pancakes

Chickpea flour is one of my new favorite ingredients to use in the kitchen.  It's great for starting roux in stews and pot pies, in homemade seitan, and of course in lots of different Mediterranean dishes.  I love falafel and Maoz is the only "fast food" that I'll eat these days.  It's still a special treat at that though because traditional falafel balls are deep fried, of course.  


I found this recipe for Falafel Patties on the package of Bob's Red Mill Garbanzo Bean Flour and decided to give them a half recipe test run with a few tweaks and they were a hit!  The biggest difference between these falafel patties was definitely the texture.  Since they are made from a flour they had more of a pancake type consistency but the flavor was dead on.  I just wanted to add a little more texture to them and zucchini was a super easy and nutritious way to do so.  The results were delicious, easy, and a fun new addition to our recipe box.  These would be great as a breakfast side or go full Mediterranean and serve them at dinner with a vegan tzatziki. 


Ingredients
Makes 6 Pancakes
  • 1 cup Chickpea (Garbanzo Bean) Flour
  • 1/2 tsp sea salt
  • 1/4 tsp baking soda
  • 1 1/2 tsp parsley
  • 1/2 tsp ground cumin
  • 1/4 tsp coriander
  • 1/2 tsp garlic powder
  • 1/4 tsp onion powder
  • 2 tsp lemon juice
  • 1/2 cup hot water
  • 2 T olive oil, for frying
  • 1 medium zucchini

  1. Wash the zucchini and trim to the top and bottom off.  Grate the zucchini on a medium-large size on your grater.  
  2. Use your hands to compress the zucchini into a ball shape and place in the center of a paper towel.  Twist the towel so it is tight around the zucchini and gently squeeze to expel some of the water from the zucchini.
  3. Mix all the dry ingredients thoroughly in a bowl.
  4. Add in the water and lemon juice and stir until all ingredients are completely mixed through.  Set aside and allow to rest for at least 10 minutes.
  5. Meanwhile, spray a nonstick skillet with cooking spray and heat over medium high heat.  Add the zucchini and cook until tender.  About 5-7 minutes.  Add the zucchini to the batter and mix thoroughly again.
  6. Heat the olive oil in the nonstick skillet over medium high heat until hot.  Spoon the batter into the hot oil (about 1 1/2 T to 2 T per pancake).  The batter will be thick so use a spatula to help spread the batter out to make each pancake thin and about 3-4 in in diameter.  
  7. Cook on each side for about 4 minutes or until golden brown.  (If you have a smaller skillet do two batches of three pancakes using 1 T of oil per batch.)


Sunday, March 2, 2014

Basic Noodle Stir Fry Starter

Use this recipe as a base for your stir fry dishes.  The ingredients are cheap and easy to prepare.  Get creative and add pieces of savory baked tofu, large steamed broccoli florets, or your favorite veggie protein.  We like to make Trader Joe's Orange Chik'n (pictured) to top it with.  The stir fry sauce is a breeze to whisk up and is so flavorful.  The toasted sesame oil adds a ton of aromatic flavor and the combo of ingredients makes a slightly spicy and sweet zippy sauce.  The same recipe also makes a great marinade for tofu!


Ingredients
Serves 2

Stir Fry Sauce
  • 3 Tbs reduced sodium soy sauce
  • 1 Tbs rice wine vinegar
  • 1 tsp toasted sesame oil
  • 1 tsp sriracha sauce
  • dash maple syrup
  • 1/8 tsp garlic powder
  • 1/4 tsp ground ginger

  • 1/2 package cooked udon noodles or 4 oz. whole wheat spaghetti, cooked
  • 1 small onion, diced
  • 1 cup frozen mixed vegetables, thawed
  • 1 cup sliced mushrooms
  • 1 Tbs coconut oil

  1. Whisk together stir fry sauce ingredients.
  2. Heat coconut oil in a large nonstick skillet or wok over medium high heat
  3. Add onions and mushrooms and cook for about 7 minutes until the onion in tender.
  4. Add mixed vegetables and noodles and continue to cook for about another five minutes, stirring frequently.
  5. Pour in stir fry sauce and mix throughly through veggies and noodles.  Cook for another 2-3 minutes or until the liquid is gone, stirring frequently.
  6. Get creative!  Now add whatever vegetables or veggie protein you'd like!

Monday, February 24, 2014

Sweet and Spicy Steamed Carrots

A super quick, easy, and spicy side dish made with a few simple ingredients.  


Ingredients
Serves 2

  • 1/2 lb of carrots (about 6-8 medium carrots)
  • 1 Tbs Pure Maple Syrup
  • 1/8 tsp cayenne pepper

  1. Wash, trim, peel, and chop the carrots.
  2. Steam carrots in the microwave or on the stove top until they are tender.  About 5 minutes.
  3. Mix in a bowl with the maple syrup and cayenne pepper making sure carrots are evenly coated and seasoned. 


Sunday, February 23, 2014

Easy Vegan Scalloped Potatoes


Ingredients

  • 1/4 c raw cashews, soaked for 2+ hours and drained
  • 1 garlic clove
  • 1 tsp salt
  • 1/4 tsp onion powder, heaping
  • 1/4 tsp garlic powder, heaping
  • 2 Tbs nutritional yeast
  • 1/8 tsp freshly ground black pepper
  • 1 T olive oil
  • 1 cups water + 3 Tbs water
  • 1 cup vegetable stock
  • 5 medium potatoes, washed and peeled
  • smoked paprika

  1. Preheat oven to 350 degrees.
  2. In a high speed blender, blend cashews, 3 Tbs water, 1 garlic clove, onion powder, garlic powder, nutritional yeast, pepper, and olive oil until smooth.
  3. Add in 1 cup of water and 1 cup of vegetable stock to the mixture and blend til evenly smooth again.
  4. Using a mandoline or by hand, slice the potatoes thinly and evenly.
  5. Spray a 9x13 glass baking dish with cooking spray.
  6. Place the potatoes in the baking dish and pour the liquid mixture over them.  Give it a stir to evenly distribute the liquid.
  7. Cover with foil and bake for 45 minutes.
  8. Uncover the dish, raise the oven temp to 400 degrees and bake for 30-40 minutes or until the tops and edges start to brown.
  9. Sprinkle with smoke paprika and serve.


It's So Easy I Couldn't Believe It Seitan


I always thought making seitan from scratch must be really hard and difficult.  Then I learned about this awesome trick of steaming the seitan instead of boiling it.  I've used the basic seitan recipe found on the package of Bob's Red Mill Vital Wheat Gluten and made a few adjustments of my own for added flavor.  Steaming the seitan results in a lighter texture then I think you get from store bought seitan which I've never really enjoyed.  


This is a super basic version that can be used for a variety of different recipes.  Try marinating the seitan and baking it or using them as cutlets for a seitan parmesan.  Make this homemade seitan and slice it for sandwiches, make it gyro style, or grind it to use as a ground beef replacement for meatless balls.  1/4 c of wheat gluten is 23g of plant based protein, whoa!


Ingredients
Makes 2 "Cutlets"

  • 1 c vegetable stock
  • 1/2 tsp Garlic Powder
  • 1/2 tsp onion powder
  • 1/2 tsp coriander
  • 1/4 tsp sage
  • 2 Tbs Nutritional Yeast
  • ground pepper and salt to taste
  • 3/4 c Vital Wheat Gluten
  • 1/4 c Chickpea Flour

  1. Thoroughly mix all dry ingredients together in a mixing bowl.
  2. Add in the vegetable stock and stir.  A dough will quickly form.
  3. Using your hands, knead the dough for about 3 minutes to form a tougher consistency.
  4. Tear off a sheet of heavy duty aluminum foil about 1 ft x 1 ft.
  5. Split the two into two even pieces.  Place each one in the center of the foil and flatten into a "cutlet" type shape about 6 in. long.
  6. Fold the aluminum into a steaming packet by folding as show in the photo above.  Bring the two horizontal edges together and seal along the top.  Fold up the side edges while leaving some space above the dough.  The cutlets will expand a little when cooked.
  7. Steam for 30-40 minutes or until the seitan feels firm.
  8. Do not open the foil packets and chill them in the refrigerator for at least 30 minutes in the refrigerator to firm up the texture.


Thursday, February 6, 2014

Funky Monkey Vegan Ice Cream


One my best friends, Matt, works for Jeni's Splendid Ice Creams, in Columbus, OH.  If you've never heard of them before, and you are a dairy eater, their ice creams are seriously insanely good.  Like the most ridiculously awesome flavors and REAL ingredients.  It's pretty much the only ice cream that I'll eat anymore, usually had as a special treat when he sends us a goodie package or we are visiting him.  Favorite flavors include Sweet Potato with Torched Marshmallow and Salty Caramel.  One of their newest flavors is Banana French Toast, YES PLEASE!

While trying to prevent myself from going to Dean & Deluca and buying (and eating) a whole pint one day, I started wondering about easy at home vegan options for ice cream as most non-dairy brands are fairly expensive too.

I saw a post on Pinterest last summer when looking for homemade vegan ice cream options that didn't require an ice cream maker.  One post suggested making banana "ice cream" simply by freezing a banana, letting it soften a bit after taking it out of the freezer, and blending it into an ice cream like consistency.  This alone was awesome flavor wise and texturally, but then I started thinking what could make it better.

The perfect match came with pairing the banana with my Chocolate Peanut Butter Cashew Cream.  Cashews, if you couldn't tell, are one of favorite ingredients to get creative with, and they add such a rich, creamy texture to any dish.

The result is SOOOO good and barely takes any effort at all.  The texture is very much like ice cream and the flavors combine beautifully together.  Try topping it with your favorites.  I did cacao nibs!


Ingredients
Serves 1

  1. Slice the banana and mix with 1/4 c   
  2. Add 1/4 c cashew cream to the banana and mix together.
  3. Place in freezer until frozen.
  4. Take out the banana/cashew mixture 20 mins or so before ready to serve and let begin to soften.  
  5. Add just a splash of non-dairy milk to get things going and blend (I used my immersion blender) until a smooth ice cream consistency.  Be sure not to add too much milk or you will end up with something more like a milk shake which isn't bad either!

Sunday, January 26, 2014

Nacho Cheese Kale Chips


I got a dehydrator this year for Christmas and I have been making multiple experimental batches of kale chips.  It's really awesome how easy it is to toss some kale and seasonings together, throw it in the dehydrator and have an amazing snack. 

After playing around with lots of different recipes I found online I settled on this combination as my favorite.  It's a mix of a few different ideas I got from different recipes but think that it's just the right combo.  I find that the lacinto kale works best for this recipe because the cashew mixture tends to get really clumpy in the curly kale.  With the lacinto kale you can lay them out flatter for a better chip and a faster drying time.  If you are in a hurry you can get by by soaking the cashews for 2 hours, but the longer you soak them the creamier the sauce will be and the more even of a coating you'll get. 

My favorite part is the freshness of the red bell pepper that's in every bite!  They really do have a nacho type flavor and the cashew coating gives the chips some crunch, substance, and serious flavor.   If you like Trader Joe's Kale Chips, you'll like these.  I bascially was shooting for something that tasted like the TJs kind.

Serve for an appetizer, party snack, or store in a airtight contain for snacking.  We haven't been able to save any so far and end up eating them straight out of the dehydrator!

  • 1 bunch Lacinto "Dinosaur" Kale
  • 2 cloves of garlic
  • 3/4 cup of cashews, soaked in water for at least 2 hours. 
  • 1 medium red bell pepper, roughly chopped
  • 1/4 cup of nutritional yeast
  • 1/4 teaspoon cayenne
  • a few dashes of hot sauce
  • Salt & pepper to taste  

  1.  Wash and dry your Kale and then tear into 3-4 in pieces.  (I don't have a salad spinner so i just lay the kale out on the dehydrator trays to dry.)
  2. Drain the cashews and combine with the garlic, red bell pepper, nutritional yeast, cayenne, hot sauce, salt, and pepper.  
  3. Using an immersion blender or a high speed blender, blend until completely smooth.
  4. Toss the kale in the cashew sauce in a large bowl evenly working the cashew sauce through all the kale.  Use your hands to evenly coat the kale pieces
  5. Arrange on dehydrator trays as flatly as possible and dehyrate at 160 degrees for about 4-6 hours.  The chips are done when the cashew coating is no longer soft.  The chips are awesome when they are still slightly warm but the longer you let them cool the more the cashew coating hardens.  NOTE:  These are not raw.  If you'd like to keep them raw you need to dehydrate them below 110 degrees.


Thursday, November 21, 2013

Chocolate Peanut Butter Cashew Cream


This recipe combines two of my favorite ingredients to use in the kitchen: cashews and powdered peanut butter.  By making your own cashew cream you create a simple and healthy spread that can be used in a multitude of different ways.  The easiest of course is spreading the cashew cream on toast for an easy and healthy breakfast.  Other uses could be using it in place of frosting to top a vegan cupcake or to add some richness and flavor to smoothies or dairy free shakes.  Try making this simple recipe and see what creative delicious uses it inspires.


Ingredients

  • 1 cup raw cashews (soaked overnight or at least for five hours)
  • 1/2 tsp vanilla extract
  • 1/2 c almond milk
  • 6-8 T Chocolate Powdered Peanut Putter (such as Just Good Stuff or PB2)


  1. Drain the cashews and discard the water.
  2. Using an immersion blender or high speed blender, blend the cashews, almond milk, and vanilla until it reaches a smooth and creamy consistency.
  3. Add the powdered peanut butter and blend until completely mixed.
  4. Place in a container and allow the cashew cream to chill and thicken in the refrigerator for a few hours.  


Wednesday, November 13, 2013

Buddy's Hotel Survival Smoothie


This year on tour I brought my immersion blender.  I've been experimenting with creating different power packed plant based smoothies to fuel me through our performances of ELF!  I've been looking for a super power packed combination and I think I've found a great mix of hemp seeds, nut butter, and chocolatey green goodness to start my day off right.

All you need are these ingredients, an immersion blender, a plastic mixing cup, and a spoon!

Serves 1

  • one banana
  • 1 cup of almond milk
  • 3 heaping spoonfuls of hemp seeds
  • 2 heaping spoonfuls of peaunut butter
  • 1 spoonful of Cacao Green Superfood powder (Amazing Greens)
  • 1 small cup of ice
  1. Blend the hemp seeds with 1/2 cup of the almond milk until it's a creamy consistency.
  2. Add the peanut butter, superfood mix, the banana (broken up into small pieces), and the remaining almond milk and blend until thoroughly mixed.
  3. Add the ice a little at a time until ice is blended through the mixture and enjoy!


Monday, October 28, 2013

autumn quinoa bowl with candied butternut squash


Love autumn with this lightly sweet and savory quinoa bowl.  The smell of roasting butternut squash lighted coated in sugar and cinnamon will fill your home with the most aromatic fall smell.  All of these flavors go deliciously together and to me, tastes like fall in a bowl!

Ingredients
Serves 2
  • 2 cups cooked quinoa
    • cook your quinoa by substituting vegetable broth for the water for a more flavorful quinoa
  • 1 half of a butternut squash 
  • 1 T olive oil
  • 1 T coconut sugar (or light brown sugar, but coconut is best)
  • 1/4 t cinnamon
  • 4 T dried cranberries
  • 2 T raw pepitas (shelled pumpkin seeds)

  1. Peel, seed, and cube your butternut squash into 1 in pieces.
  2. Place in a bowl and coat with 1 T olive oil.  Add in the cinnamon and coconut sugar and stir to coat evenly.
  3. Roast in a glass baking dish for about 40 minutes in an oven preheated to 425 degrees, stirring halfway through.
  4. Per Serving - Add 1 cup cooked quinoa to a bowl and top with half of the roasted squash, 2 T dried cranberies, and 1 T pepitas each.

Thursday, October 17, 2013

Basic "Chik'n" Barley Soup


This is a super basic, simple version of a vegan chicken noodle soup.  I didn't use any actual "chicken" type substitute, but I did use a vegan chicken broth bouillon that I found at Whole Foods.  I've been using a veggie broth bouillon lately for most of my soups, but the chicken noodle soup flavor that these bouillon cubes had totally reminded me of eating Campbell's soup as a kid!

Ingredients
Serves 2-4 

  • 4 cups water
  • 2 vegan "chicken broth" bouillon cubes
  • 4 stalks celery
  • 3 carrots, peeled
  • 1 small onion
  • 1 cup quick cook barley
  • 1 Tbs coconut or olive oil
  • Salt and Pepper to taste
  1. Begin to dissolve the 2 bouillon cubes in 2 cups of warm water.
  2. Dice the celery, onion, and carrots. 
  3. Heat the oil in a large pot over medium high heat.
  4. Add the carrots, onion, and celery to the pot and cook until the vegetables are softened, stirring frequently.  About 10 minutes.
  5. Reduce the heat and add the 2 cups of dissolved bouillon to the pot as well as another 2 cups of water (4 total).
  6. Add the barley and bring the pot back to boil.
  7. Salt and Pepper to taste.  I personally liked a lot of fresh cracked black pepper with this recipe.
  8. Reduce heat and simmer covered for 20-30 minutes, stirring occasionally. 


Sunday, October 13, 2013

Microwave Vegan Buffalo Dip


I'm so excited about this recipe!  I've been trying different variations of a buffalo chicken dip that we used to make in college.  That recipe called for 2 bricks cream cheese, cheddar cheese, and ranch dressing.  The first few rounds mimicking that original recipe but with vegan substitutes didn't really hit the spot.  There's something about the vegan cream cheese that just doesn't work, but inspiration finally hit, and I think the secret is using tofu sour cream instead of cream cheese.  

This result is what I came up with using four simple ingredients and a microwave.  This serving size would be great for two people to share.  Double it or more to take to a party as a great dip or appetizer!  Serve with tortilla chips.

Ingredients
Serves 2
  • 2 frozen chik'n patties, like boca burger
  • 1/2 c daiya cheddar shreds
  • 1/4 c tofu sour cream
  • 1/4 c buffalo sauce
  1. Microwave each chik'n patty for 1 minute in the microwave.
  2. Dice both patties into cubes.
  3. Combine all ingredients in a microwave safe bowl and mix well.
  4. Microwave for one minute.
  5. Stir and microwave for another minute.
  6. Stir and serve with tortilla or pita chips.

Basic Vegan Cashew Cheese Sauce


I've been really wanting to try making my own cashew cheese sauce but have always been intimidated because I don't have a food processor.  I came to find out that by soaking the cashews I could easily make a delicious creamy cashew cheese sauce using my immersion blender.  I've since been experimenting with different takes on this basic recipe but this is the basic recipe that I have been using as a base and is definitely good on its own!


Ingredients
Makes about 2.5 cups

  • 1 cup raw cashews
  • 3/4 c almond milk
  • Juice of one lemon
  • 1/4 tsp paprika, heaping
  • 1/2 tsp onion powder, heaping
  • 1/2 tsp garlic powder, heaping
  • 1/2 tsp salt
  • 1/4 c nutritional yeast
  • 1/2 to 1 cup water
  1. Soak the cashews in warm water for at least 2 hours.
  2. Combine all ingredients except the water.
  3. Using an immersion blender, work the ingredients into a smooth a consistency as possible.
  4. Transfer the mixture to a saucepan and heat over medium heat for 10-20 minutes stirring very frequently.
  5. Add 1/2 to 1 cup extra water to achieve desired consistency.  Don't add extra water for more of a dip consistency.  Add more water for making a cheese sauce for noodles or vegetables.
Adapted from this recipe.

baked balsamic tofu & curry veg burrito


Make a big batch of baked tofu anytime and store it in the fridge for easy sandwiches and burritos like this all week.  The basic recipe for baked tofu is baking marinated tofu slices at 425 degrees in the oven for 20 minutes on each side.  Here I've used Balsamic salad dressing as a marinade and it's so good with the curry flavor of the veggies.

Ingredients 
Serves 4
  • 4 whole wheat burritos 
  • 1 package super firm tofu, drained and pressed 
  • Light balsamic dressing
  • Assorted veggies (pepeprs, squash, snap peas, etc.)
  • Curry powder
  • salt and pepper to taste
  • coconut or olive oil
  • Optional: tofu sour cream and vegan cheese
For the Baked Tofu
  1. After draining and pressing the tofu, cut into long pieces.
  2. Place in a bowl and coat with dressing evenly.  Cover and let marinate in fridge for at least 20 minutes or an hour or longer for more flavor.
  3. Baked in the oven for 40 minutes turning once halfway through and brushing with more dressing.
For the Curry Veggies
  1. Cook vegetables in 1 Tbs coconut oil.
  2. Add Curry seasoning and a dash of salt and pepper.  I recommend the taste and adjust method when cooking with curry.  Start with a healthy dash, mix it in, taste it, and go from there adjusting up to your perfect level of curry.  
Assemble the Burritos
  1. Warm the tortillas in the microwave.
  2. Smear the center of the tortilla with the tofu sour cream and sprinkle a palmful of cheese on top.
  3. Layer the veggies and tofu, roll up and eat!


buffalo chik'n salad


A simple way to spice your daily dose of greens.  Just a frozen chik'n patty, some supa dupa greens, and some baby bella mushrooms.  I like it without any extra dressing, cause let's face it, i'll eat pretty much anything if it's soaked in buffalo sauce, or pair it with a vegan ranch or blue cheese dressing.

Ingredients
Serves 1

  • 2 large handfuls of dark leafy greens, I've used a baby kale mix here
  • 1 frozen "chik'n" patty, such as Boca Burger
  • 1 small handful baby bella mushrooms, sliced
  • 2 Tbs buffalo sauce 
    • Make a your own vegan buffalo sauce by mixing Frank's Hot Sauce with a small pad of butter substitute, like Earth Balance.
  1. Cook the chik'n patty in the microwave according to package's instructions.  
  2. Pour the buffalo sauce onto the patty and use your finger to coat the whole patty in sauce. 
  3. Slice patty into about 8 slices.
  4. Toss greens and mushrooms in a bowl and top with the chik'n strips and drizzle a little extra hot sauce if preferred or dress. 


Saturday, October 12, 2013

spicy sausage and jack muffin


Sausage and cheese sandwiches used to be a staple of my breakfast routine.  Since going veggie I have experimented with lots of meat substitutes and some are better than others for sure.  Morningstar Farms makes a spicy sausage patty that is one of my favorites.  Here's my vegan take on my old breakfast standby.

Spicy Sausage and Jack Muffin
Serves 1

  • 2 spicy sausage patties
  • 1 whole wheat English muffin, split
  • 1/4 of a large onion
  • coconut or olive oil
  • 1 vegan pepper jack cheese slice cut diagonally into two triangles
  1. Slice onion and sauté over medium heat with a small pour of oil until cooked and caramelizing.
  2. Cook the sausage according to package instructions on a skillet or in the microwave.
  3. Split and toast the English muffin.
  4. Layer each half of the English muffin with a cheese triangle, then half the onions, and a sausage patty.
  5. Serve with some vegetables or fruit.