Pages

Thursday, February 6, 2014

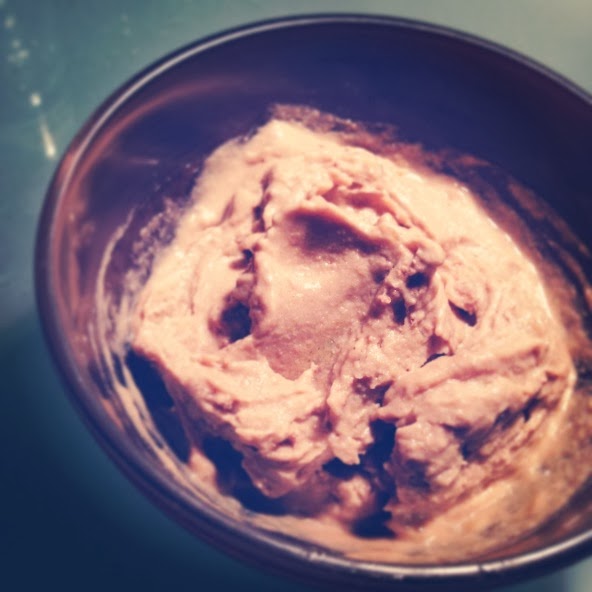
Funky Monkey Vegan Ice Cream


One my best friends, Matt, works for Jeni's Splendid Ice Creams, in Columbus, OH.  If you've never heard of them before, and you are a dairy eater, their ice creams are seriously insanely good.  Like the most ridiculously awesome flavors and REAL ingredients.  It's pretty much the only ice cream that I'll eat anymore, usually had as a special treat when he sends us a goodie package or we are visiting him.  Favorite flavors include Sweet Potato with Torched Marshmallow and Salty Caramel.  One of their newest flavors is Banana French Toast, YES PLEASE!

While trying to prevent myself from going to Dean & Deluca and buying (and eating) a whole pint one day, I started wondering about easy at home vegan options for ice cream as most non-dairy brands are fairly expensive too.

I saw a post on Pinterest last summer when looking for homemade vegan ice cream options that didn't require an ice cream maker.  One post suggested making banana "ice cream" simply by freezing a banana, letting it soften a bit after taking it out of the freezer, and blending it into an ice cream like consistency.  This alone was awesome flavor wise and texturally, but then I started thinking what could make it better.

The perfect match came with pairing the banana with my Chocolate Peanut Butter Cashew Cream.  Cashews, if you couldn't tell, are one of favorite ingredients to get creative with, and they add such a rich, creamy texture to any dish.

The result is SOOOO good and barely takes any effort at all.  The texture is very much like ice cream and the flavors combine beautifully together.  Try topping it with your favorites.  I did cacao nibs!


Ingredients
Serves 1

  1. Slice the banana and mix with 1/4 c   
  2. Add 1/4 c cashew cream to the banana and mix together.
  3. Place in freezer until frozen.
  4. Take out the banana/cashew mixture 20 mins or so before ready to serve and let begin to soften.  
  5. Add just a splash of non-dairy milk to get things going and blend (I used my immersion blender) until a smooth ice cream consistency.  Be sure not to add too much milk or you will end up with something more like a milk shake which isn't bad either!

Craft Time - The Valentine Olympics!


I am a huge fan of the Olympics and am so excited to spend the next two weeks watching anything and everything Olympic related.  Bring on the curling!!!!  It's also a great excuse to try some new snack and appetizer recipes to munch on while we are hiding from the NYC winter outside and watching the games!  I wanted to decorate for Valentine's Day, but also have some Olympic flare as well, so I came up with these Olympic Ring pennant banners.  

I cut triangle "pennants" out of white paper and used toilet paper tubes dipped in paint to create the ring design on each triangle.  I used a metallic gold ribbon to string them together.  I hung some in the picture as shown and put a swag over our kitchen window as well.


As always, whenever decorating for the holidays I refer to the the one and only source for fun, easy, budget friendly crafts, my good friends The Crafty Lumberjacks.  I made this Valentine's "cherry blossom" vase arrangement inspired by their St Patty's Day clover piece.  Looking forward to making that one for next month too!

For the cherry blossoms I used a circle punch to cut out red and pink circles.  I placed two circles side by side without overlapping and stapled across the middle of them.  Bend the staple in half and thread floral wire through one of the "loops" of the staple.

I'm not a very big football fan, but was heading to a Super Bowl party with friends from college. I was trying to think of something to give us a fun activity to do in between the commercials and half time show, which is what I was watching, and crafted these fun photo booth props in the teams' colors from card stock.  So easy, cheap, and provided us with lots of fun!

Sunday, January 26, 2014

Nacho Cheese Kale Chips


I got a dehydrator this year for Christmas and I have been making multiple experimental batches of kale chips.  It's really awesome how easy it is to toss some kale and seasonings together, throw it in the dehydrator and have an amazing snack. 

After playing around with lots of different recipes I found online I settled on this combination as my favorite.  It's a mix of a few different ideas I got from different recipes but think that it's just the right combo.  I find that the lacinto kale works best for this recipe because the cashew mixture tends to get really clumpy in the curly kale.  With the lacinto kale you can lay them out flatter for a better chip and a faster drying time.  If you are in a hurry you can get by by soaking the cashews for 2 hours, but the longer you soak them the creamier the sauce will be and the more even of a coating you'll get. 

My favorite part is the freshness of the red bell pepper that's in every bite!  They really do have a nacho type flavor and the cashew coating gives the chips some crunch, substance, and serious flavor.   If you like Trader Joe's Kale Chips, you'll like these.  I bascially was shooting for something that tasted like the TJs kind.

Serve for an appetizer, party snack, or store in a airtight contain for snacking.  We haven't been able to save any so far and end up eating them straight out of the dehydrator!

  • 1 bunch Lacinto "Dinosaur" Kale
  • 2 cloves of garlic
  • 3/4 cup of cashews, soaked in water for at least 2 hours. 
  • 1 medium red bell pepper, roughly chopped
  • 1/4 cup of nutritional yeast
  • 1/4 teaspoon cayenne
  • a few dashes of hot sauce
  • Salt & pepper to taste  

  1.  Wash and dry your Kale and then tear into 3-4 in pieces.  (I don't have a salad spinner so i just lay the kale out on the dehydrator trays to dry.)
  2. Drain the cashews and combine with the garlic, red bell pepper, nutritional yeast, cayenne, hot sauce, salt, and pepper.  
  3. Using an immersion blender or a high speed blender, blend until completely smooth.
  4. Toss the kale in the cashew sauce in a large bowl evenly working the cashew sauce through all the kale.  Use your hands to evenly coat the kale pieces
  5. Arrange on dehydrator trays as flatly as possible and dehyrate at 160 degrees for about 4-6 hours.  The chips are done when the cashew coating is no longer soft.  The chips are awesome when they are still slightly warm but the longer you let them cool the more the cashew coating hardens.  NOTE:  These are not raw.  If you'd like to keep them raw you need to dehydrate them below 110 degrees.


Thursday, November 21, 2013

Chocolate Peanut Butter Cashew Cream


This recipe combines two of my favorite ingredients to use in the kitchen: cashews and powdered peanut butter.  By making your own cashew cream you create a simple and healthy spread that can be used in a multitude of different ways.  The easiest of course is spreading the cashew cream on toast for an easy and healthy breakfast.  Other uses could be using it in place of frosting to top a vegan cupcake or to add some richness and flavor to smoothies or dairy free shakes.  Try making this simple recipe and see what creative delicious uses it inspires.


Ingredients

  • 1 cup raw cashews (soaked overnight or at least for five hours)
  • 1/2 tsp vanilla extract
  • 1/2 c almond milk
  • 6-8 T Chocolate Powdered Peanut Putter (such as Just Good Stuff or PB2)


  1. Drain the cashews and discard the water.
  2. Using an immersion blender or high speed blender, blend the cashews, almond milk, and vanilla until it reaches a smooth and creamy consistency.
  3. Add the powdered peanut butter and blend until completely mixed.
  4. Place in a container and allow the cashew cream to chill and thicken in the refrigerator for a few hours.  


Wednesday, November 13, 2013

Buddy's Hotel Survival Smoothie


This year on tour I brought my immersion blender.  I've been experimenting with creating different power packed plant based smoothies to fuel me through our performances of ELF!  I've been looking for a super power packed combination and I think I've found a great mix of hemp seeds, nut butter, and chocolatey green goodness to start my day off right.

All you need are these ingredients, an immersion blender, a plastic mixing cup, and a spoon!

Serves 1

  • one banana
  • 1 cup of almond milk
  • 3 heaping spoonfuls of hemp seeds
  • 2 heaping spoonfuls of peaunut butter
  • 1 spoonful of Cacao Green Superfood powder (Amazing Greens)
  • 1 small cup of ice
  1. Blend the hemp seeds with 1/2 cup of the almond milk until it's a creamy consistency.
  2. Add the peanut butter, superfood mix, the banana (broken up into small pieces), and the remaining almond milk and blend until thoroughly mixed.
  3. Add the ice a little at a time until ice is blended through the mixture and enjoy!